Monday, October 20, 2008

Girl Scout Project Update

You may remember from a post on September 20th that another paper artist, Barb Stewart, and I recieved a grant for an installation at the beautiful new Girl Scout building in town. After working with approximately 60 girls to get this project accomplished, it is finally hung for all to see. We made 24 handmade paper quilt blocks, each with sheets of paper that the girls made themselves. The handmade paper quilt is entitled “Celebrating Similarities/Embracing Differences”.


These 12" x 12" blocks could have been hung in different configurations: 4 x 6, 3 x 8 or 2 x 12. Barb and I expected to get an entire wall to hang the quilt but, as you can see in this picture of me trying to get each block just right, we were instead asked to fill a well traveled corner of the building that was bland and boring. The best solution became a 2 x 12 hanging arrangement.


While not what we planned, it turned out quite nicely. And, the corner is definitely not boring any longer! In case you're wondering why they are hung so close to the ceiling, it is because we didn't want the girls/visitors touching the artwork each time they walked past.


This was a fun project for all involved and I hope to do more of this type of thing. It was empowering for the girls and the artists.

Lorrie

PS. Last week I made 60 sheets of paste paper before running out of energy and paint. That stash should keep me for awhile!

Tuesday, October 14, 2008

Paste Painting - How to do it

The last post showed you some paste papers. Maybe it whet your appetite and would like to know how to do it? It's simple.


1. Set up your workstation with the following: paper (any paper that will withstand some abuse will work), tools (repurpose household items and toys), 2" brushes, paste paint (see previous post for what I like to use). This picture shows my table in the garage on this beautiful fall day.


2. Brush the paste onto the paper, not too thick so that it doesn't hold your marks and not too thin so that it dries quickly. To begin use only one to three colors or you may find that you wind up with mud. Use your tools, working from the elbow not the wrist, to make marks in the paste. The idea is to loosen up your artwork not to overthink it. Part of the fun is seeing what the various tools will do. If you don't like the result, just paint over it. This picture shows green and yellow paste mixed together with a brush.


This picture shows the same sheet with marks made. The squiggles were made with oil pastels in the wet paste.


3. Let it dry. As long as I've set up my work station, I will probably be making paste papers for several days. I made about 20 sheets today. I will cut each sheet down into 8 note cards and sell the packet. I never have enough of these to sell so it makes good sense for me to make a bunch of sheets at once.


Have fun.


Lorrie


Tuesday, October 7, 2008

Paste Painting - what is it?

I've often had people ask about paste painting. My work often is made with paste painted paper, I teach workshops about paste painting and there are many mentions of paste painting on this blog. The easy answer to the question of "what is paste painting?" is this: paste painting is finger painting for grown ups. I find that paste painting is a great way to loosen up my artwork. When I get stuck or too uptight about my art, a day spent with paste paint is a great way to play. I can then take this more relaxed approach to whatever else I'm working on.


There are many "recipes" out there for the paste and everyone that does this has their favorite. Rather than cooking my own paste I buy Elmer's Art Paste from Dick Blick. It is cheap, makes a lot, it keeps forever and it is handy to have around in it's little box just waiting to be mixed with water. After the paste of choice is made I add acrylic paint. You don't have to use the good stuff to get great color. The mix is approximately 40% paint and 60% paste. There is no need to measure, just add paint until the paste has the opacity that you'd like.


The mosaics in the previous post were made with paste paper scraps. (I always have lots of those around!) These pictures are bigger sheets. Can you guess what tool was used to achieve the effects on the orange one?

Lorrie

PS. It's a sponge mop!

Wednesday, October 1, 2008

Paste Paper Mosaics

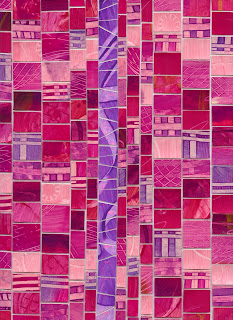
This past week I started working on some pieces with mosaics. Mosaics can be made with just about any paper you've got around. In my case all of my tiles are my own paste paper designs. Each sheet of mosaic tiles that I'm showing you in this post are one inch to quarter inch pieces of paper put onto a clear sheet of laminate. I think they are quite lovely just as they are but each of these sheets of mosaics has a future as something else in a more finished form.


This pink and orange sheet of inch by 1/2 inch tiles has black "grout".


This is the same sheet of tiles but with white "grout".

The tiles on this sheet vary from one inch to a quarter inch.


Another one with a little bit of everything. All the tiles on this one are blue paste paper scraps.


This sheet is made up of quarter inch square pieces.


More on paper mosaics after some additional progress is made...


Related Posts with Thumbnails