Showing posts with label work-in-progress. Show all posts

Thursday, April 28, 2011

Waiting for the Opportunity

The Artists Co-op that I belong to recently had a show opening at the Kalamazoo Nature Center.  Called Earth:  the Power and Fragility, this show had some super work from about 15 members.  So, in the middle of the basement remodel, my painting class, a trip to NY as well as interviewing for a job and ferrying the kids around, I had a show-quality (shouldn't they all be show-quality?) piece to create. 

I juried into this group as a handmade paper and paper mosaic artist so this is the type of work that I needed to make.  It felt good working with the heavily textured handmade paper again!

My idea on this theme was to highlight the plight of the Great Lakes with regard to the very invasive Asian Carp. These fish are expected to enter the Lakes via the Mississippi River and Illinois Canals.  Currently there are "zappers" in the canals that are supposed to keep the fish from entering Lake Michigan through the Locks but it is inevitable that these fish, with their voracious appetites, will get into the Lakes and alter the ecosystems.  These fish are just Waiting for the Opportunity.

Here's my progression over several days:


Back to working with handmade paper again.  Yeh!  The fish are handmade paper fish glued onto a canvas.  The chair that is supporting the canvas gives you an idea of scale.

A coat of tan paint went over the whole thing then I started to build the colors of the water.

Each fish received it's own color.  My formerly bright and fun fish had to become rather dark and menacing.  Asian Carp are not pretty fish!  The white over the blue on the right is plaster.

Continuing to layer blue on blue on blue on blue.  I used my fingers for about 90% of the water on this piece.  Very little brush work involved.

The fish get a bit of highlighting with copper paint and the Lock is put in.  The lock is more plaster so it is raised.  Lots of dimension on this piece.


The Lock is painted copper as well.

OMG!!  What happened?!?  Stay tuned...

Lorrie

PS. That is what they call a cliff hanger. :)


Wednesday, March 30, 2011

Art 105 - Collage Assignment

The latest assignment for my painting class was to make three 9" x 12" collages. One of the collages would then be painted. Of course this meant that I could only choose collage images that I felt I could paint. Quite a limiting factor! :)

Collage #1:
I like the curves in this collage: the flamingos necks, the ear, the softness of the butterfly's wings, the small dots in the background. I also like the moodiness of the blue trees. This is why I didn't choose this one. I didn't feel I could capture the trees in a painting. On to the next one...


Collage #2: In contrast to the curves in #1, this one is all lines. Too boring, although probably not too difficult to paint. On to #3...


Collage #3:
Yep, this is the one. I like orange/yellow as the key color, the silly mood and the color balance. Hey, I think I can actually paint this one too. Once we picked the collage we intended to paint we had to mark it with a grid pattern. That's why there are lines on it. Wish I had scanned it prior to the grid marking it up.


Next post: Collage turned into Painting.


Lorrie

Friday, March 25, 2011

Art 105 - Progression of a Still Life

For those of you following me because of my handmade paper art, my apologies for not having much of that type of thing on the blog lately.  Between general life with three kids, finishing the basement and my painting class the only art getting accomplished around here is for the class.  I hope you'll stick with me though as I continue to explore painting as a way to enhance my handmade paper art. 

In my last post I showed you some initial efforts for the class.  Thankfully, I'm improving.  Or, at least my efforts aren't too embarrassing for public viewing. 

Having never done a still life before I decided to record my progress as a reminder that what comes before doesn't have to remain after. I'm frequently afraid, in a good share of all of my finishing work, that I'll mess up something that is already somewhat successful. One of the biggest lessons coming from this class is that you can just paint over it. Of course, I know that in my brain. But, when you actually do it over and over, it becomes rather freeing in the heart.

This is an 18 x 24 canvas at my kitchen table (I mean easel).  A key to a good still life is the directional lighting.  Since my birdhouses were too big to fit in a box in which I could control the light easily, I found myself painting at night with one directional light to make the shadows.  This was a pretty good trick as I was able to see the shadows on the still life yet barely see what I was painting!

I drew in the objects with vine charcoal.  Great stuff as it is easily wiped off when you don't get a line right.  The perspective of most of this is fairly accurate but it took a lot of wiping off first.


Oh my, this is so brown.  The assignment required that we use only white, black, yellow ochre and magenta.  Hence, the brown.


I'm liking the ripped up wall paperish background.  Check out the shadow being cast from the little white house onto the red one.  I'm getting it, I'm getting it!


I have been trying to post this for days.  Blogger is just not cooperating with the downloads.  So, you'll have to wait til the next post to see the finished piece...


Lorrie

Thursday, May 27, 2010

Paper Mosaics - Green Basketweave


While I was painting the book I showed you in the last post I did lots of extra sheets in shades of green for use in paper mosaics. There are so many steps when making paper mosaics that I'm truly afraid to count the hours in a completed piece!

Have a great holiday weekend. As with most of our April, May, June weekends, my family will be at the soccer fields with 10 games for sure (potentially 13) for our 3 kids. Craziness!

Lorrie

Wednesday, May 5, 2010

Basketweave Paper Mosaic Pattern #2

Here's try #2 on the basketweave pattern with paste paper strips.  Each square is one inch.  Once you get a rthymn going, it moves along pretty quickly.  Well, I guess "quickly" isn't quite the right word.  Let's just say it goes faster than "slowly".  I have a plan for all this pink...


You can see try #1, in shades of brown, in my March 21st post.

Lorrie

Monday, April 26, 2010

New Paper Mosaic Sheets

On Friday, after working my last-fundraiser-ever at the elementary school, I got moving on some paper mosaic sheets.  As usual, the papers that I use are sheets of commercial tagboard that I paste paint on.   These will be made into picture frames, mirror frames and the other home decor items.


Lorrie

Thursday, April 22, 2010

Andrea Peterson Workshop - My Pulp Painting Results

Continuing with the Andrea Peterson workshop...  here is my work from the pulp painting frenzy.  None of these are finished.  But, all (I think) have potential...


Poured pulp and a little brush work.  This was the last one I did of the day and it took me about 5 minutes.  I think it has the most potential.  Don't you think that I'd learn one day that the stuff I labor and fuss over is usually less good?

Playing with orange.


1.  Pull white sheet.  2.  Pour blues and purple.  3. Use stencil for flower blossom.  4.  Use dental syringe for orange squiggles.  5.  Wrinkles are bugging me.

This one was also toward the end of the day.  I used mostly leftover colors just to get ride of them.  Fence stencil used on the bottom.

Poured background, drips made by flinging pulp with a spoon tip, brushed on brown pulp over a stencil.
I made the fence stencil during the workshop.  Original photo is from our trip to Monticello last year.


Next steps on all of these is probably to go back in with pastels and/or ink.  We'll see.

Andrea's studio, Hook Pottery Paper in LaPorte, IN, is not far from here and several Guild members and I hope to made a road trip this summer to see her set-up (she uses sustainable art practices whenever possible) and spend more time with this really cool lady.

Lorrie

Sunday, March 21, 2010

New Mosaic Pattern

I'm excited about a new basket weave mosaic pattern that I just tried using paste papers that I made earlier this week.  Each square is one inch.  Eyes are a little wonky now.


So, what's with the brown? I never seldom work in brown. A very patient friend has been waiting for a frame for her bathroom mirror for quite some time and this mosaic pattern will be a part of the effort.

I've really not been creating much lately. I'm in a wheel spinning routine that doesn't seem to let me actually make art but I'm thinking about it constantly. Part of trying to finally get off this Wheel of No Fortune has been to clean up my studio and putter with some things I found while cleaning it out. I'll show you some of that stuff later.


Lorrie

Friday, October 2, 2009

Being Brave - Day 6 and DONE

I had such energy, such momentum, such excitement in the creation of this piece and you all spurred me on. Thank you so much for that. Then, I dropped you. No follow up post. No explanation. No Ta Da moment. I am so, so sorry! If you'll forgive me, I now can show you the work done during my last frenzied day of work.

If you'll remember, when last we met, I had just smeared the whole darn thing with tar. Yes, tar! The job then became getting most of the tar concoction off with mineral spirits. As it turned out the tar mixture being thinner than I wanted was a blessing. I had to work a long, LONG time with lots of rags to get the tar off and had it been thicker I can only imagine how much longer I would have been at it. Here is the piece after some/most of the tar was taken off.


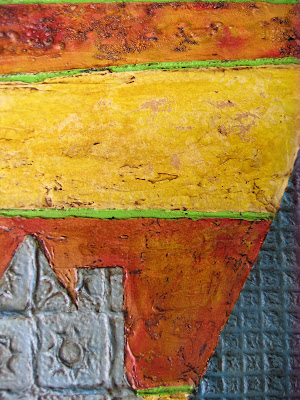
It still isn't bright enough though so... I added quite a bit of oil pastel work as my last "layer". These two pictures really don't look all that different but in real life there was quite a contrast.


Above Close up: After tar removal, before pastel addition.

Below Close up: After pastels added. It's unfortunate this picture doesn't do a better job showing the pastels. The red/orange parts actually have magenta and hot pink highlights. The blue houses all have shades of light blue, dark blue and purple.

Extreme (blurry) close up. You can see how the tar stays in the cracks and crevasses. If my artistic style showed a preference for dark colors this certainly is a great way to get "dark" quickly. However, since I still love my brights, this technique provides a wonderful way to add depth and alter true bright colors with a patina.

The end of this saga is that I finished it up (without a varnishing coat, yikes), got it to the show space on time and it is now hanging proudly with the work of other Handmade Paper Guild members. In my next post I plan to show you the venue and give you a better description of the actual show. Surprise preview: This piece actually has a name and it's not called Being Brave.

Thanks for sticking with me!

Lorrie

Friday, September 18, 2009

Be REALLY Brave - Day 5

Today was the day that all my progress so far (and I really like what I've done so far) got covered up with tar. Yep, you read right: tar. The next step for this piece is to use a concoction of asphalt crack filler and mineral spirits to cover up the whole darn thing. The usual, paralyzing thoughts came into play: don't mess up, you like what you've got, don't mess up, DON'T MESS UP! I had to take a deep breath to put that first brush load of black on my beautiful clean colors! I was able to shove the defeatist thoughts aside only because I'm on a deadline, and frankly I had no choice. I plowed ahead and let the tar fly.


I did, however, have a big frustration with my supplies. The tar is supposed to thin down with the mineral spirits. I've done it before and it worked fine. The viscosity of the mixture is supposed to go from goo to the consistency of glue. It wouldn't thin down. In fact, the tar and the mineral spirits wouldn't even mix (think oil and vinegar). The result was that I had to use the very, very thin mineral spirits with only a bit of the color provided by the tar. Not quite the effect I was looking for. I hope it still works.


Step 9: Cover the whole thing with tar. You can see in this photo how thin the tar was. The whole piece, at this point in the process, should be totally black with no/little color showing through. Since the mixture was so thinned down, I did it twice.


Even the side view looks pretty cool!


Close-up. And below, a super close close-up.


I'm off to a soccer tournament in Lansing for the weekend so now it sits until Monday. Wow, I'm really cutting this one close (too close!) as it is due at the Kalamazoo Civic Theatre for our show on Wednesday.


Have a good weekend.


Lorrie


Thursday, September 17, 2009

Being Brave - Days 3 and 4

So far so good, but the time it takes to dry in between layers of paint/spackle/glue gets frustrating. When I take the time to work, I like to get to it, not be interrupted with waiting.


Here are pictures from Days 3 and 4...


Step 5: Paint the spackle with house paint, again. Let dry thoroughly. I'm not sure I need all these layers of paint, but I'd rather have too many layers than too few. Some of it may end up showing up again as an underlayer. If I do more work in this style I'll get a better feel for what must be done and what short cuts I can take. At this point, I really feel like I'm constructing a piece of art rather than painting it.


Step 6: Spray paint certain areas. Dry.


Step 7: Use heat gun to bring up bubbles. Don't burn down house. When the canvas starts smoking it's time to take a break! Lots of fumes so I work outside. The use of spray paint and the heat gun is bit tricky because I want more control than these tools allow. I find myself using scraps of wood to block out certain areas to keep paint/bubbles away. It works but is awkward. Day 3 ends with not much visible progress but the efforts will show up as I continue.


Step 8: Paint, paint, paint. Dry. Spray with a fixative. My neck hurts from bending over the table all day. Wow, looks a lot different by the end of day 4! Now I feel like I'm creating instead of constructing.

Here's a close up so you can see the texture a bit better. I really like what I've got so far. Tomorrow is the Be Really Brave day. Stay tuned as I continue with this adventure...


Lorrie

Tuesday, September 15, 2009

Being Brave - Days 1 and 2

I tend to overthink things both in life and in my art. Sometimes its a good thing. I usually make good life decisions. Sometimes its a bad thing. I'm not as spontaneous as I'd like to be with my art. Well, I now have a situation artistically that requires some fast process-oriented thinking and actual doing.


Next week the annual Handmade Paper Guild show of Southwest Michigan will hang. I have one piece done. The other, much larger piece, has been done in my mind for months (that whole overthinking thing again) but is certainly not done so that others can actually see it. I've never be brave enough to post my in progress work because I always want to make sure what I'm working on turns out before showing anyone. Well, because of this show deadline, and because I need entertaining fodder for the blog, and because I'm going to be brave this week, I'm going to show you how it goes along the way.


I can only hope it turns out as good as what's in my brain!


Here we go: I'm using new techniques for me. In May I took an online course with a guy named Gary Reef. (Notice I didn't show you any of that WIP but I will as some of them are finished now and I had some decent results.) Anyway, I love his abstracts and was thrilled to be able to get a glimpse of the techniques he uses. I'm using some of his techniques and added what I love: handmade paper.


Step 1: The canvas is 2' x 4'. Draw out where I want the handmade paper to go. Can you see the forms of houses?


Step 2: Cut highly textured handmade paper to fit the sketch. Glue down paper. Dry. Ignore the colors on the HMP as it will all be painted over.


Step 3: Paint the whole thing with housepaint. Two coats on the HMP as it is very absorbant. Thus ends day 1.


Step 4: Cover the background with a texturing medium (spackle/glue) and put string in the spackle. Let dry. Remove string. Day 2 ends.


More as I go. Encouragement, tips, criticism is all welcome...


Lorrie
Related Posts with Thumbnails